In order to stay on top of your automotive skills, it is necessary to know how to replace wheel bearings. This guide specifically deals with providing clarity on how to change these wheel bearings and how a press tool can be of use for achieving perfection. By the end of this guide, whether you are an experienced mechanic or a weekend warrior, you will be able to understand the use of a press tool. That knowledge alone will make it easier for you to complete this task without damaging anything and with the new bearings being able to last a longer time. Overall, this is an all-inclusive guide that will help you gain insight into how to master this vital repair skill with ease.
What is a wheel bearing press, and why do I need one?
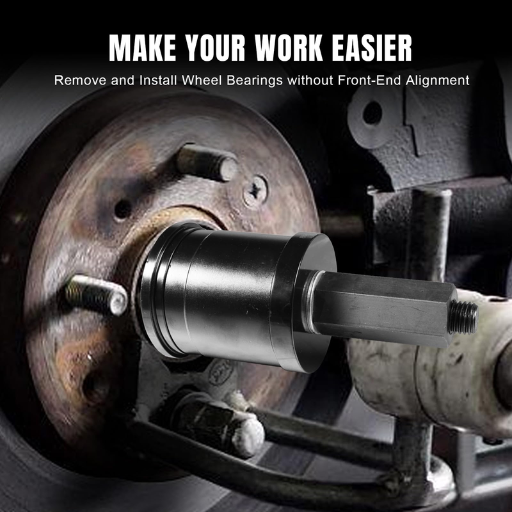
A wheel bearing press is a very handy machine that is used especially for the removal and installation of the wheel bearing. Every auto has some components that need controlled pressure while being seated or removed. This machine does the job perfectly and eliminates the chances of damaging a nearby component. This equipment is a must since it makes a complex procedure less cumbersome, with the chances of the component being installed incorrectly being reduced. It also helps increase the life of not only the bearing but also the suspension system of the vehicle.
Understanding the importance of wheel bearings
wheel bearings are the most important kitten of all for the safe and smooth functioning of any vehicle. They bear the load of the vehicle and facilitate rotational movement of the wheels in order to minimize friction. If the wheel bearings are not in good condition, then uneven tire wear, grinding sounds, or even difficulty in the steering will persist. Neglecting their importance will affect the efficiency and safety aspects of your vehicle, which is the reason I regularly tell my clients to keep up with the regular checks and maintenance so that in the future, they don’t have to shell out a lot of money.
Benefits of using a wheel bearing press tool
Whenever you hear of a Bearing Press Tool, how do you use it? Such tools come in handy since they ensure that your installation or removal of wheel bearings is done efficiently as well as with precision. Such tools also offer the additional advantage of minimizing the labor that is required to complete a task, as well as reducing the margin of error of damaging surrounding components while at the same time ensuring that the fit is secure and appropriate. This tool ensures the safety and durability of the wheel assembly of the vehicle, hence making it an invaluable tool for any auto mechanic or even a hobbyist.
Types of wheel bearing press kits available
For wheel bearing press kits, I have worked with several types that are useful for different purposes. Some of them are even basic manual kits. Depending on the task, these are affordable and can be used for small-scale tasks; however, they are more laborious and time extensive. If you’re looking for efficiency over these kits, then hydraulic press kits are the way to go, as they provide an extra thrust with almost no effort, which allows them to be used a lot in professional environments. You can also find kits that are designed to work with specific car brands and models allowing them to fit perfectly when being installed. In my personal opinion, it is wise to purchase an all-inclusive universal kit as it will allow you to effortlessly complete a large number of tasks.
How do I identify a bad wheel bearing?
To ensure wheel bearings do not cause any damage or accidents, it’s vital to nip it in the bud, and this involves identifying the signs of a lousy wheel bearing. One of the most common indicators is roaring or even grinding noise that comes from the wheels; it usually gets more problematic when accelerating. You may also notice that your tire wears out quicker than the other, or even a vibrational shake within the steering wheel. Also, if the car drifts too much to one side when braking or if there is a loose feeling in the steering wheel, then it’s advisable to check the wheel bearings. Detecting a bad wheel bearing in an early stage is imperative to mitigate any risks or damage.
Common symptoms of a failing wheel bearing
one can argue that understanding the early signs of a malfunctioning wheel bearing failure could be helpful in remaining safe on the road. One of the indicators is noise, i.e., a grinding or humming sound that appears to be getting louder with time. I’ve also noticed issues with steering, which may include vibrating steering wheels or the steering wheel pulling a vehicle to one side. Look out for those symptoms, and have a regular inspection of your tires, which may show uneven wear. The situation can be nipped in the bud. It is also worth noting that ignoring these symptoms could lead to expensive major repairs in the future.
Inspecting front and rear wheel bearings
In regard to checking the front and rear wheel bearings, I first concentrate on their physical condition by conducting a visual inspection. I always check whether there is any leakage around the hub assemblies because such leakages are often associated with failing seals. After that, I check the wheel’s movement by raising the car and pushing the wheel forward and backward. If there is a sound like grinding, the bearings have to be repaired. Also, I slightly swing the wheel forward and backward to check for play because excessive looseness may indicate wear. Because of the regular repairs and observations of these aspects, the bearings of the wheel’s output force will be preserved, and there will be no more serious problems in the end.
What’s the process for pressing out old wheel bearings?
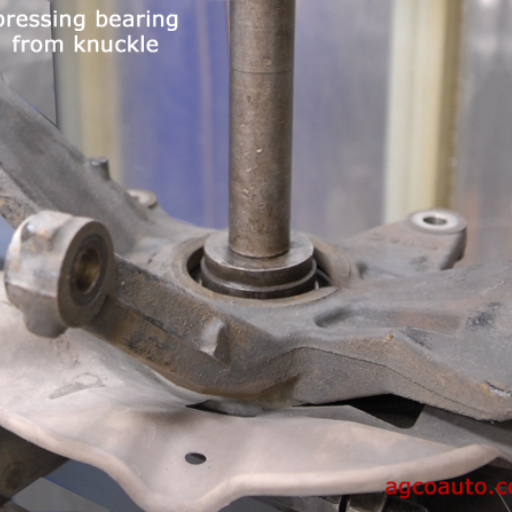
Еliminating out worn-out wheel bearings requires a delicate procedure so as not to interfere with the adjoining parts. To start with, the wheel assembly and, by extension, the hub have to be removed to access the bearing. Utilize a press of hydraulic mechanism of putting off a bearing or such device that removes excessive pressure to unlock the bearing. However, it is vital to check pressing as improper fitment may result in the variability of pressures which can eventually cause damage. Following the removal, clean the surrounding housing in order to facilitate the placing or the integration of a new bearing. Do refer to the vehicle-specific documentation in terms of step-by-step procedure and the required torque settings.
Preparing your vehicle for bearing removal
Before I proceed with the process of bearing removal, I always give a step wise guide which emphasizes on the saying, practice makes perfect. To begin with, the lifted vehicle must be firmly placed on the jack stands to avoid any chances of movement. Make sure that all necessary tools are ready to use, including hydraulic press, bearing pullers and protective gear, and much more. It is recommended that the area around the bearing be cleaned and that there is no debris or dirt that could interfere with the process or create contamination problems during the fitting of the bearing. In addition, it should go without saying that looking at the vehicle’s service manual is also a must – that way, you’re sure that you perform the right step with the appropriate torque values. People do say that time is money. Well, if you spend enough time in preparation and organizing yourself, odds are that it will be helpful for the future and make the job relatively easier.
Step-by-step guide to removing old bearings
Take care in removing the old bearings; this is an essential step that assists in the proper placing of new bearings and the overall integrity of the working equipment. Adhere to the proceeding steps with caution and attention:
- Gather Necessary Tools and Safety Gear:
While undertaking the project, do not forget to wear gloves and goggles, as debris can fly and cause damage. Equip yourself with stuff like a socket set, hammer, bearing puller, safety goggles, and a torque wrench.
- Secure the Vehicle or Equipment:
If handling a machinery item ensure it is powered off before commencing the task. Otherwise, jack your vehicle up and fix a jack stand to secure it in place. Likewise, while working on a machine, it’s vital to secure it in a way that accidental movement can never happen.
- Remove the Wheel or Outer Component (if applicable):
Now, the final step is to remove the wheel which in turn gets you access to the bearing assembly, this is done by unscrewing the lug bolts or nuts. Make sure to keep all the removed materials organized so that reassembling them becomes less of a hassle.
- Locate and Access the Bearing Assembly:
Seeing and Getting to the Bearing Assembly The first thing to do is to locate the bearing on the hub or housing location. Depending on how it’s designed, you might also have to take off some other parts, such as brake calipers, rotors, or covers, in order to reach the bearings.
- Clean the Surrounding Area:
Cleaning the Surrounding Area Next, carefully clean up the area around the bearing using the appropriate cleaning agent. This step is a triple-barrel shot directed at dirt and gunk that, if left behind, can create problems during and after the replacement period.
- Use a Bearing Puller to Remove the Old Bearing:
Getting Detaching the Old Bearing with a Bearing Puller Now, following the instructions of the tool, connect the bearing puller to either the hub or housing. Thereafter, gently try to draw the Old Bearing out of the assembly by applying a little force. Don’t use too much force because the surrounding parts might get damaged.
- Inspect the Assembly Area After Removal:
After Removing The Bearing How To Inspect The Assembly Area When the removal of the bearing is complete, carefully check the areas of the hub or housing for any signs of damage such as cracks, scoring, or abnormal wearing. If any other components that are to be replaced are damaged before the installation part, replace those first.
If your priority is to remove old bearings without causing any damage to the parts adjacent to them and later have an efficient installation of new bearings, then definitely work through with the given step-by-step approach.
Tips for dealing with stubborn or seized bearings
I know that there are tough tasks, but removing stubborn or seized bearings doesn’t have to be one particularly if you follow the appropriate guidelines. Here is how to do it without injuring the surrounding area or components, step by step:
- Apply Penetrating Oil:
Soaking a bearing is an important process that involves inserting the bearing in a specific liquid. The liquid is intended to penetrate the bearing which means it has to be lubricated in oil before being submerged, this is the first step. Areas surrounding the bearing should be lubricated with penetrating oil or high-quality lubricant and oil to make the penetration process easier. One might assume oil to be dangerous but it isn’t, therefore an intact body should be submerged overnight as this yields the best results. Two and a half hours min to thirty minutes max is the time period for submersion to be effective.
- Use Heat Carefully:
Heat can also be applied to the overlapping area or the housing if the situation sees application of oil to be ineffective. Caution is recommended with using a torch or heat gun as the temperature should be kept around two hundred to three hundred degrees. One side of the bearing should be heated in order to let it loosen or expand and aid the other side in remaining intact during the whole procedure; this should quicken the delay. Avoid overheating areas to other sensitive sections, as that may result in long-lasting damage.
- Mechanical Tools for Grip and Force:
When dealing with a stuck bearing, it becomes a must to use a gear puller or a bearing puller, as these give the best results. It allows evenly distributed pressure to be used on the bearing thus penetrating the lubricant. Furthermore ensure the arms of the pullers are even and tight around the area, this will stop them from moving for further damage.
- Tap It with Care:
Sometimes, a slight but forceful knock with a cutter utilizing a punch. In this case, it is recommended to use brass or any other soft material so as not to cause any damage can work the trick of losing a stubborn bearing. Begin with gentle taps, and if necessary, make them more forceful.
- Inspect Alignment and Corrosion:
Establish whether the problem is due to misalignment and or corrosion. Usually, wire brushing or sandpapering coarse surface rust or corrosion makes the task of bearing extraction easier.
- Avoid Excessive Force:
A typical example of a faulty design is using Fowler wedges to yank out a bearing and causing an impact load to all surrounding structures, including the housing on the bearing, which is absolutely nonsensical. You are far better off waiting and taking small steps.
How do I properly press in new wheel bearings?
It is really important to ensure proper tools and precision are at hand when pressing in new wheel bearings for a smooth installation. Based on my experiences, what I do first is start off by cleaning the housing completely since leaving some unwanted particles would result in improper seating and fast wear. Then, I always insert the wheel bearings with an actual bearing press or something suited for the purpose, as these tools were designed for the specific job. The insert is all about fitting the bushing right and pressing it gently, applying an even amount of pressure in order to not damage the bearing and the hub. While it is wise to lightly lubricate them in order for the bearing to install better, it also comes with a risk of overdoing it as too much grease can attract contaminants that are unwanted. Finally, the last thing that I do before putting the rest of the components together is to ensure that the bearing is in place, touch-smoothly, and spin-free. Consistency always brings out the best result.
Selecting the right bearing for your vehicle
Always begin by checking the manufacturer’s guidelines. This will avoid bearing incompatibilities. Gauge what bearing to use considering its type suspended from the structure operating environment (ball, roller, or taper), and use load and location characteristics. Furthermore, materials and precise engineering is critical for durability and functioning. Quality should never slip, because poor bearings not only lead to failure but a huge dent to the pocket as well due to repairs.
Techniques for pressing in new bearings correctly
My strategy for pressing in new bearings is precise and methodical so as to maximize the bearings’ life span. The first step involves cleaning the area since any debris might get inserted into the bearing, compromising its functioning. Using a pressing tool or bearing installation tools, I apply uniform pressure to avoid rough handling of the bearings as I sit them in position. To prevent distortion of the internal parts of the bearing, I remember always pressing only the outer race of fixed bearings and the internal shaft-mounted bearings. After finishing the installation, I always check if the bearing is correctly fitted and is rotating freely, and I make required adjustments if needed. These steps have proven invaluable in achieving reliable results every time.
What tools do I need for wheel bearing replacement?
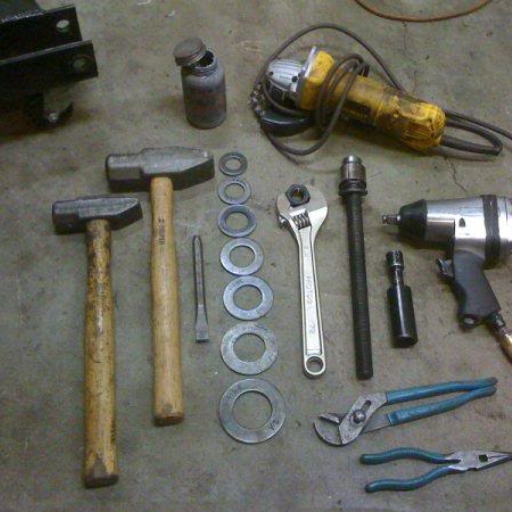
I always make sure I have relevant tools prepared when replacing a wheel bearing, as having the right equipment is essential to performing the job correctly and safely. So here’s the list of tools which I have used and what they are helpful for:
- Socket Set and Wrench – Shocking purchases any person making their first attempt at DIY car repairs would call them. However, according to my team, they are necessary to take out a wheel with the brake assembly. Such bolts are tightened up with sockets and spanners. However, some speculations require some standard span sizes to complete the process easily.
- Torque Wrench – Another somewhat uncommon tool that, to most of you, would seem to be a luxury instrument is the torque wrench, a very useful addition in any repair workshop. Every bolt is meant to be borrowed at the torque recommended by the manufacturer, failing to do so bolting NZ the Boulder transport agency would depart from a dubious manipulation that would affect the machine’s life.
- Breaker Bar – When removing the stubborn bolts and lug nuts, using a breaker bar usually does the trick as it uses extra torque for tougher requirements.
- Hammer/Mallet – A rubber mallet or small hammer whenever something has stuck onto the hub or the old bearing,. Just use these tools but slowly so as not to cause unnecessary trouble.
- Bearing Press or Hub Puller – In order to either fit or take off the bearing, a bearing press or hub puller is something one has to have. This avoids potential harm to sensitive parts.
- Snap Ring Pliers – These particular pliers make removal and installation a lot easier for vehicles that have snap rings holding the bearings in place.
- Grease and Cleaner – The application of wheel bearing grease is quite important as it lubricates, cleans, or a degreaser makes sure that everything else is spotless before installing a new bearing.
- Jack and Jack Stands – There is no way around having a firm and strong setup. The ideal jack and long-lasting jack stands, respectively, lift the car off the ground during the maintenance process.
- Work Gloves and Safety Goggles – You should not forget about safety. Putting on gloves will keep your hands protected, while goggles will prevent anything from getting into your eyes.
In each case, these tools are very helpful in the process as having them at hand saves time and avoids damaging the car or parts that were placed. Investing in tools that will most likely come through with quality and builds that are strong is a must!
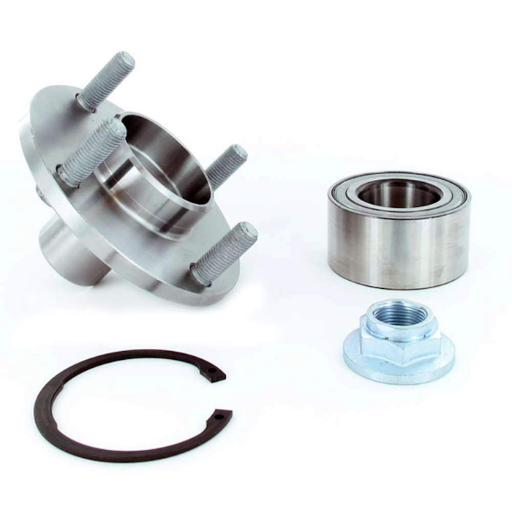
Essential components of a wheel bearing press kit
I have come to understand that a specialized wheel-bearing pressing machine is very helpful while performing repairs. The critical elements are various heavy-duty press sleeves and cups to fit different bearing sizes, a properly machined press screw or forcing screw for the application of uniform pressure, and a set of adapters for ensuring proper orientation of the bearings while fitting or removing them. Also, strong supporting equipment is necessary so as to avoid any dislocation during the process. There are also kits that come with a cover plate or spacer to protect other parts from being damaged. Buying a good quality kit with such a setup not only makes it easier to accomplish the task but also increases the vehicle’s accuracy and lifespan.
Additional tools that may be helpful
Aside from bearing press kits, a torque wrench will put bolts properly every time, and hence, they will not be over or under-tightened. For vehicles, a breaker bar is also useful for removing the bolts that hold certain components together. If needed, a digital caliper can be utilized to accurately measure different components. Finally, anti-seize lubricant is quite useful as it will prevent rust and ease any future servicing.
Choosing between a shop press and a portable press tool
When deciding on a shop press or a portable press tool, the scale and frequency of work need to be evaluated. A shop press is preferable where great force and stability are required, heavy work, or in a professional shop. A portable press tool, on the other hand, is needed where great mobility is required in cases like field repairs and slight jobs. Identify your needs and expectations, work area, and financial allowance to decide which one fits you best.
Can I replace wheel bearings without a press tool?
Yes, it is possible to change wheel bearings without a press tool, however doing so requires a bit of elbow grease and using other methods. In my case, when I needed to remove or install the bearings, I simply resorted to using a hammer, punch, or even a bearing puller kit. Nevertheless, this method requires a careful approach in order to not destroy the hub or the new bearings. It is feasible, albeit the result is smoother And the risk of making a mistake is reduced, I recommend utilizing a press tool if one is at hand.
Alternative methods for bearing removal and installation
Aside from removing and installing the bearing, there are some alternative methods that I found to be useful but quite tedious and time-consuming. It’s possible that any scraping adopted can use appropriate dimensions, a common example being the use of bearing pullers kits, which help with grasping and pulling. During the installation, one can use a bearing socket along with a hammer to drive the bearing into position. Another alternative is heat and cold—for instance, putting heat on the hub or ice on the bearing might make it easier. While these techniques certainly work, it would be prudent to be steady and cautious during application, as manipulating the elements can lead to breakage.
Pros and cons of DIY methods vs. using a press tool
Regarding the benefits and drawbacks of self-repairing processes versus a press tool, I have practical contact that both methods have their advantages and disadvantages depending on how you want to tackle the issues at hand. Here’s a breakdown to help you make an informed decision:
DIY Methods
Pros:
- Cost-Effective: Instead of having to spend money on a press tool, all you need in order to do the job yourself is a few simple tools such as a hammer, sockets, or a bearing puller.
- Accessibility: Most of the population has some of these tools lying around in their workshop, so you can easily start without new tools purchased.
- Skill Development: Doing the work by yourself helps the person to understand the parts and the processes more, which is something that hobbyists or beginners may find very fulfilling.
Cons:
- Higher Risk of Damage: The usage of common tools such as hammers or wrenches entails a greater risk of bearing or hub damage due to disalignment in the event that due care is not provided.
- Time-Consuming: : In the absence of appropriate tools, replacing bearings becomes significantly more challenging, especially when components are stuck and require constant effort to get them unstuck.
- Physical Effort: Many beginners or people working in a nonstandard setup may find such work frustrating since DIY methods entail rigorous engagement and pin-point, eye-to-hand coordination. And even a small mistake can mess up everything.
Using a Press Tool
Pros:
- Precision and Accuracy: A press tool provides proper alignment and exerts proper force translating to less chances of damaging components.
- Time Efficiency: The right press tool makes the task easier and quicker, allowing it to be used in many applications, such as layered operations or when dealing with many bearings.
- Professional Results: The outcomes of the task are much clearer and more professional with the use of a press tool, which enhances the longevity of the product.
Cons:
- Higher Initial Cost: Also, press tools along with related machines may not be very practical for people who occasionally accrue press forms due to their high initial investment, especially for the quality press models.
- Learning Curve: It is worth noting that it is relatively easier to set up and use the press, but there is a learning step involved. This may take some time.
- Storage and Space Requirements: At the same time, their weight is quite considerable and thus cannot be kept in a typical workshop as they require a lot of space.
The decision often comes down to how often one would use it and the spare resources they have. If your job is only focusing on bearings occasionally, consider doing it yourself with some due diligence on preparation. But if you engage in such operations frequently or would like to be 100% confident of high accuracy, the expenditure on a press tool is justified in terms of the productivity levels and accuracy it offers.
When to consider professional help
there are particular cases in which hiring a professional is the best option. For instance, if you are working on very delicate or costly parts where even a small blunder would mean a big setback, then it’s best to leave it to a professional. Furthermore, when you do not have the required tools, equipment, or even the space to carry out your work efficiently, handing over the task to a third party ensures that the job is done safely, comfortably, and effectively. Moreover, they are well-versed in practicalities, which turned out to be very helpful in complicated or annoying situations, like ice-bound bearings or funny ones. In the end, while being a ‘jack of all trades’ can be satisfying, understanding the importance of a specialist can prevent you from wasting time, money, and nerves over a single task.
What’s the typical cost of wheel bearing replacement?

On average, the replacement of wheel bearings, which includes labor, costs around $150 and could be as high as $500 or even higher for a single bearing, although a complete hub replacement is much more expensive. A wheel bearing costs about 50 to 200 dollars in parts alone, and the rest costs in its labor. The replacement costs can go up in some cars which are expensive. Replacement on time is important so that further repair works don’t cost more in the future.
Factors affecting wheel bearing replacement cost
In my earlier years, including my industry experience, I learned that a number of factors usually affect the cost of replacing wheel bearings. The first important aspect is the vehicle make and model because more affluent or niche vehicles often are hoisted by expensive parts and more labor. The second thing is whether the repair concerns replacing just one bearing or the entire bearing hub assembly because one is somewhat cost-intensive. Also, the cost of labor differs based on your place and the experience of a mechanic. Finally, not replacing it in time can also cause extra damage, like damage to the axle or hub, which will also increase the cost. If you ignore these worries and handle them to the end, then they will cost you more later, and you will have to go through more trouble as well.
DIY vs. professional replacement: Cost comparison
Though going the DIY route may appear to be a cheap option for replacing wheel bearings, there are quite a number of disadvantages associated with this course of action. Labor cost savings are appealing, however there is also a high chances of botched installations which can be caused by a lack of appropriate tools, know-how and accuracy and this can cause more harm and risks to the vehicle. On the other hand, a professional who replaces the wheel bearings ensures an appropriate replacement because of the specialized equipment and knowledge at their disposal. Simply put, the initial cost may be higher if one opts for professional services, but the convenience and assurance that such is provided limits the chances of incurring costs associated with DIY blunders in the future.
Tips for saving money on wheel bearing replacement
Start by locating some reliable suppliers or online markets to get some high-quality wheel bearing replacement parts, and consider comparing prices. One may also look for offers on the auto shop to get quotes cheaper than the market rate by taking different services from the shop. In order to reduce maintenance costs, it’s smart to combine work by carrying out additional repairs. Making sure that the tire pressure, tires themselves, and their alignment are appropriate will also considerably limit the chances of having to replace the wheel bearings. Following that logic, cleaning up problems during periodic checks can make sure that more costly repairs don’t have to be made in the future.
Reference
- How to Change Wheel Bearings: 12 Steps (with Pictures) – wikiHow
- What is a car wheel bearing? How do you replace them? – RAC
- DIY Guide: How to Replace Your Car’s Wheel Bearings – Goodhood
Frequently Asked Questions (FAQs)
Q: What is a wheel bearing press tool , and why is it necessary for front wheel bearing replacement?
A: A wheel bearing press tool is a specialized device used to remove and install wheel bearings, particularly for front wheel bearings. It’s necessary because wheel bearings are often tightly pressed into the wheel hub, making manual removal difficult or impossible. The press tool applies controlled force to safely extract the old bearing and install the new one without damaging the hub or the bearing itself.
Q: How do I know if I need to replace my front wheel bearings?
A: Signs that you may need to replace your front wheel bearings include a grinding noise when driving, steering wheel vibration, or uneven tire wear. A noisy wheel, especially one that gets louder with speed, is often a clear indicator. If you notice any of these symptoms, it’s best to have your wheel bearings inspected and replaced if necessary to prevent further damage to your vehicle.
Q: Can I use a hydraulic shop press instead of a specialized wheel-bearing press tool?
A: While a hydraulic shop press can be used for wheel bearing replacement, a specialized wheel bearing press tool is often more convenient and safer. The press tool is designed specifically for this task and includes various adapters to fit different wheel hub sizes. However, if you have access to a hydraulic shop press and the right adapters, it can be an effective alternative for pressing out the old bearing and pressing in the new one.
Q: What’s included in a typical wheel-bearing press tool kit?
A: A comprehensive wheel bearing press tool kit usually includes a central spindle or forcing screw, various sized adapters for different hub and bearing sizes, a bearing puller, and sometimes a bearing race removal tool. For example, the VEVOR Wheel Bearing Press Kit or a similar 23 pcs FWD bearing puller tool set would typically include these components, allowing you to work on a wide range of vehicle makes and models.
Q: How do I use a press tool to remove a front wheel hub bearing?
A: To remove a front wheel hub bearing using a press tool, first ensure the wheel and brake components are removed. Select the correct adapter that fits your wheel hub. Position the adapter behind the bearing and use the press tool to apply pressure to the center of the hub. Gradually increase the pressure until the bearing is pressed out of the hub. Always follow the specific instructions provided with your press tool and consult your vehicle’s service manual for any model-specific procedures.
Q: Is it possible to replace wheel bearings without a press tool?
A: While it’s possible to replace some wheel bearings without a press tool, it’s not recommended for most modern vehicles, especially those with press-fit bearings. Attempting to remove or install these bearings without the proper tools can result in damage to the bearing, wheel hub, or surrounding components. For safety and to ensure proper installation, it’s best to use a wheel bearing press tool or have the job done by a professional.
Q: Can the same press tool be used for both front-wheel drive (FWD) and rear-wheel drive (RWD) bearing replacement?
A: Many wheel-bearing press tool kits are designed to work on both FWD and RWD vehicles. However, the specific adapters or procedures may differ. For instance, a press kit labeled “23 pcs FWD bearing puller” is primarily designed for front wheel drive vehicles but may include components that work for RWD as well. Always check the tool specifications and your vehicle requirements before beginning the job.
Q: How do I know if I need to replace just the bearing or the entire wheel hub assembly?
A: In some cases, you may only need to replace the bearing itself, while in others, replacing the entire wheel hub assembly might be necessary. If the hub shows signs of damage or excessive wear, or if the bearing is integrated into the hub (common in many modern vehicles), you’ll need to replace the entire assembly. Always inspect the hub carefully and consult your vehicle’s service manual or a professional mechanic if you’re unsure.
Q: Are there any special considerations when using a press tool on a Polaris or other ATV/UTV wheel bearings?
A: When working on ATVs or UTVs like Polaris models, the process is similar to automotive wheel bearing replacement, but the components are often smaller and may require specific adapters. Some press tool kits include adapters suitable for Polaris and other quad vehicles. Always ensure you have the correct size adapters and follow the manufacturer’s guidelines. The compact nature of these vehicles might also require additional care to avoid damaging surrounding components during the bearing replacement process.
Q: How long does it typically take to replace a wheel bearing using a press tool?
A: The time it takes to replace a wheel bearing using a press tool can vary depending on your experience and the specific vehicle. For a seasoned DIY mechanic, the process might take 1-2 hours per wheel. This includes time for removing the wheel, brake components, and hub, pressing out the old bearing, pressing in the new bearing, and reassembling everything. Novices should expect the job to take longer. Always allocate extra time to ensure you can complete the job safely and correctly.