It is important to keep in mind that proper trailer-bearing maintenance will ensure that your journeys are pleasant and that your vehicle will last a long time. One of the best ways in which bearings can be kept well-greased is the use of Bearing Buddy. This guide, therefore, aims at helping both a first-time trailer owner as well as a frequent trailer user to understand the vague and comprehensive dimensions of “What bearing buddies are, why they are important, and how to use them properly.” Bearing in mind such thorough instructions will save you from unnecessary additional expenses of reparations or loss of your bearings as it can help you avoid traumatic experiences with your trailer. Let’s focus on what steps, tips, and benefits come with using Bearing Buddies so as to protect your investment and improve your towing experience.
What Are Bearing Buddies and How Do They Work?
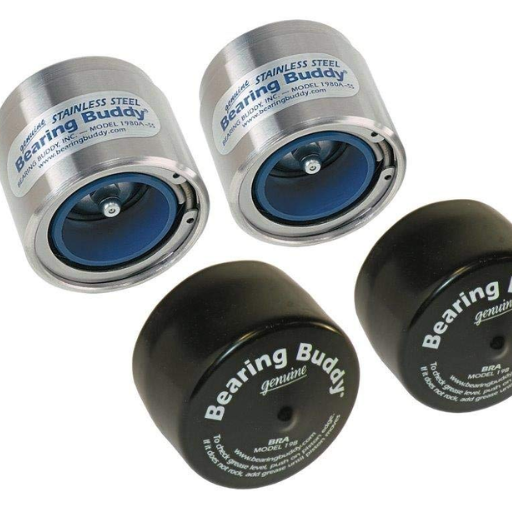
Bearing Buddies refer to specialized tools whose aim is to enhance the life of lubricated grease-filled trailer wheel bearings or wheel hubs, as they manage to block contaminants like water and dirt from gaining access to the hub. They work by ensuring that grease is always present in the *bearings*, by putting them in a sealed space that has a certain pressure above ambient. This leads to a longer operational lifetime for the bearings. Bearing Buddies effectively eliminate the risk of moisture penetration to the bearings or wheel hubs encased in trailers which also reduce the wear and tear, performance is increased and maintenance is easy for trailer owners.
Understanding the Function of Bearing Buddies
In my opinion, Bearing Buddies serves a considerable purpose in ensuring that maintenance of your trailer is not only performed timely but also saves considerable amounts of money and time. In essence, these gadgets guarantee that the wheel bearings of your trailer are always adequately lubricated and protected from dirt and other harmful particles. Their functional principle is the following:
- Maintaining Consistent Grease Levels
Bearing Buddies has a unique feature, which is the load spring piston. This means that the bearing receives grease as long as there is a little bit of pressure placed on the bearing. This pressure acts as a sealed zone so that there is no entry of water or any dirt particles, even when the bearings are being used for longer durations or are exposed to tough environments.
- Preventing Moisture Contamination
The worst enemy of wheel bearings is moisture, especially when you are launching a boat trailer or towing in wet places. The patented technology in Bearing Buddies stops the water which tries to enter the bearing hub which would reduce the amount of rust and corrosion, this is one of the important elements that contribute towards a longer lifespan of your bearing.
- Critical Pressure Management
Bearings can be damaged by Too much pressure. This predictable design feature of Bearing Buddies includes a provision for grease to be expelled from the joint when the amount added exceeds a certain level. Hence, risks to the seals or even to the other parts are not posed; thus, self-preservation manages the inside conditions to accommodate the bearing movement function.
- Simplifying Maintenance
The usual approach to maintaining a bearing means frequent dismantling to clean out and replace grease. This is not only a ‘sticky’ operation but can take a considerable amount of time to do Bear Pals’ quick checking and topping up of grease. Grease will also be an indicator on most models by a Blue Indicator Ring that will display when grease needs topping or is okay.
A solution on how best to protect the wheel bearings of your trailer and wheels, for that matter, is provided on the premises of Bearing Buddies. If you are concerned about the condition of your trailer then these devices need to be part of your maintenance arsenal.
Benefits of Using Bearing Buddies on Trailers
Bearing Buddies are game-changers for any potential vehicle trailer owners and users who understand how vital it is to take care of their wheel bearings and avoid overspending on maintenance services. In my experience, the use of bearing buds persists as one of the best solutions, as these shields cut through the risks of bearing rust and contamination by providing a continuous inflow of grease, which can lead to expensive breakdowns. The high built-in grease relief pressure and grease monitor make it impossible to hinder the pumped grease which makes it much easier to achieve lubricant balance. Within the bearings of the trailers, there is a good investment that is reliable and stays assisted through long-term savings. Bearing buddies are a simple choice for any trailer owner.
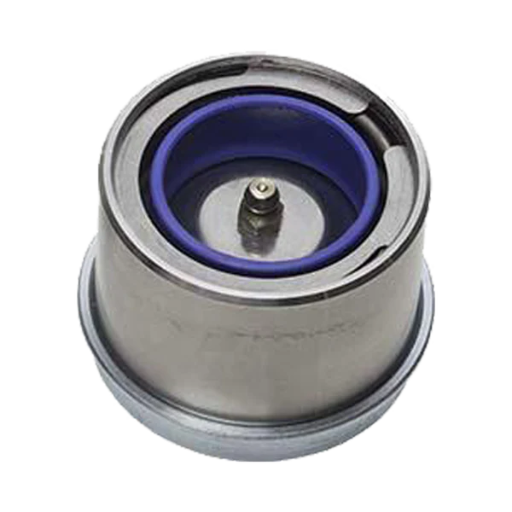
Components of a Bearing Buddy System
This system has been devised in a very simplified way and encompasses a couple of Bearing Buddy products that include a main unit that attaches directly to the wheel hub and a spring piston that exerts a pre-load, thus controlling the flow of grease into the bearings while the grease fitting or the Zerk fitting enables easy application of grease. Also, there is a pre-emptive valve for the automatic release of pressure to avoid unit overpacking and a cover to protect the unit from dirt and soil. In a nutshell, these parts are integrated together to perform a similar function of lubricating and sealing wheel bearings from dust and dirt.
How do you install bearing Bulbs on your trailer?
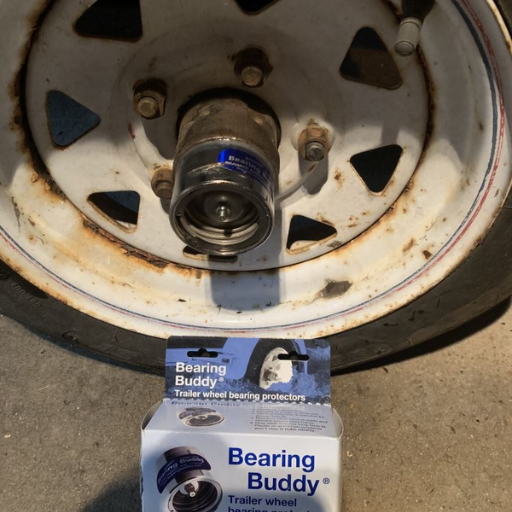
When it comes to the installation of Bearing Buddies, the entire process seems fairly easy for someone experienced in the procedures. First, it is important for the trailer to be placed on a level platform and well-wedged to prevent any movement. Use a rubber mallet or pliers to pry off the dust caps that are on the wheel Hub of the trailer, but ensure you do not damage the hub. Next, place the Bearing Buddy on the hub and use the rubber mallet to fix it in a top position. Remember to use a grease gun to fill the unit with grease up to the level where a spring-loaded piston starts moving outward. To finish off, grab a cover for the Bearing Buddy and place it onto the device to avoid filth from getting into the device. Undertaking these few procedures will surely increase the lifespan of the wheel bearings and permit you to trailer without any issues. As such, Based on my experience, installation of Bearing Buddies on your trailer is a simple approach that I have been shown how to do time and time again, more so ensuring that the trailer is on a stable surface that is securely chocked before using a rubber mallet or pliers to remove the dust caps on the wheel hubs. Placing the the Bearing Buddy in position on the hub and gently tapping it using a mallet and using a grease gun to fill the unit with grease is also part of this process, guaranteeing me a seamless experience with the wheel bearings.
Step-by-Step Guide to Install Bearing Buddies
In my professional opinion, applying Bearing Buddies is quite easy, and it is crucial to put measures in place to safeguard your trailer’s wheel bearings. Let me outline this in detail, step by step:
- Prepare Your Trailer
Begin the assembly by leveling off the trailer and parking it on a flat surface. Check the wheel, which will prevent undesired movements while the attachment is taking place. Be more careful and more reasonable in the execution of the actions, and check once again whether the trailer fits well enough at that stage.
- Remove the Dust Caps
Removal of coarse paste product replacement might be assisted with a rubber mallet, but I suggest using an even gentler approach through rubber-assisted pliers. Carefully removing rough-cover dust caps from the hubs as a first step is crucial, and being gentle means not breaking the hub itself.
- Align the Bearing Buddy
Take emphasis on the proper center alignment of the Bearing Buddy with the open firing on the hub of the trailer’s wheel – with a growing need stemming from the anticipation of problems during the installation of the Bearing Buddy. Bearing Buddy should be aligned before attachment.
- Tap the Bearing Buddy Into Place
Without creating chances of damaging any components, place the Bearing Buddy close to the hub and, using a rubber mallet, start tapping it. Apply even strength to the mallet – and Barely press so that it stays in place and helps develop a well-formed shape where your goal is complete sealing and tight lash.
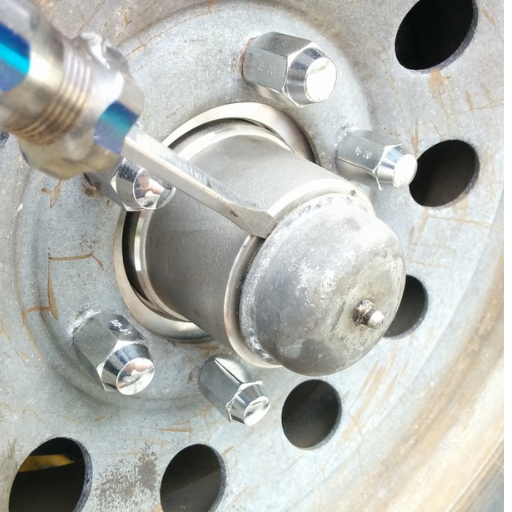
- Add Grease Using a Grease Gun
The next step involves filling the Bearing Buddy with grease; at this stage, you may want to move the Bearing Buddy slightly, depending on how easily it can be done, in order for this unit to fit over the grease center. The gauge on the grease center needs to be aligned with the grease fitting on the bearing buddy. Once accomplished, you may insert a grease gun into the grease fitting on the unit. Pump grease into the unit until you see the spring-loaded piston start to move outward. This is how I know the level inside the hub has ample grease.
As such, the described sequence of operations will ensure an adequate protection seal and a steady supply of lubrication to the bearings, thus avoiding corrosion, overheating, and excessive wear. The consequences of neglect or hasty performance of every single step are particularly important with regard to the effective functioning of the Bearing Buddy system. Let us stress, both in words and illustrations, the importance of proper sequential execution of each and every operation!
Tools Needed for Installation
In order to set up a Bearing Buddy in a correct manner, the following tools are required:
- A hammer or mallet as it is used to tap the Bearing Buddy down
- A block of wood which may be placed in between the two to avoid any harm from tapping
- A grease gun compatible with the grease fitting
- Rags or a paper towel, if available, to wipe excess grease
- Moreover, gloves or other helpful material to protect the hands is also recommended
These items are preferable to avoid any hurdles while setting up the Bearing Buddy.
Common Mistakes to Avoid When Installing
I have also noticed that an installation cleaning of the hub is missing quite often during the assembly. This creates the possibility of dirt being trapped between the surfaces and grease leaking. Using a hammer to fix the Bearing Buddy is another mistake that people do while fitting; instead of hammering it a better technique is to tap it with a block of wood. Also, avoiding both extremes of grease application on the hub is important. Too much grease leads to overflow, while too little grease means that the bearings will not get enough lubrication and can overheat. Lastly, it is also essential that the screws are all tightly fitted; this is the last step which is often neglected while installing. It serves no purpose to have the Bearing Buddy fitted incorrectly. To have a successful assembly, sufficient time should be put in on each step.
How Often Should You Add Grease to Bearing Buddies?
Adding grease to Bearing Buddies depends to a large extent on their use and operating conditions. As a general suggestion, check the grease level once every three to six months or prior to a long journey. If the trailer is often put into water, e.g., when a boat is launched, grease may be required on a more frequent basis. Always check that the spring-loaded piston on the Bearing Buddy protrudes slightly, which indicates that there is sufficient grease inside. Regular maintenance is one of the most important prerequisites for proper working so that the bearings last longer.
Signs That Indicate You Need to Add Grease
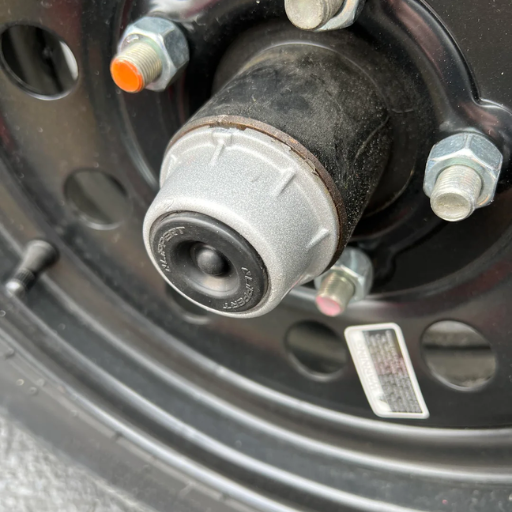
Based on my experience, there are a few fairly straightforward indicators that tell me that it is about time to add some grease to my Bearing Buddies. One of the most evident is when the spring-loaded piston appears to be fully retracted, which shows that there is insufficient grease. Also, hub noises that are out of the ordinary, like squeaks or grinding, are also indications of a lack of grease. One of the other important signs is excessive heat emitted from the hubs of the trailer during rotation; this usually means that there is not enough grease on the bearings. Being on the lookout for such signs and fixing the issues as soon as possible will avoid hefty repair costs and, more importantly, prevent damage to the necessary components that allow the trailer to function appropriately.
Recommended Frequency for Greasing
Based on my industry experience, I advise inspecting and adding grease to your Bearing Buddies every 3,000 to 3,500 miles or, at the very least, once every season, depending on utilization. After each use, frequent examination is appropriate, especially for water-intense trailers like boat trailers. Consistent maintenance makes the bearing optimum and less prone to damage.
How Much Grease Should You Use?
How much grease should be used with Bearing Buddies is my advice regarding this issue. I do recommend that grease be added till you see the spring-loaded piston moving outwards, but not more than that. On the other hand, an overload of grease might lead to seal rupture, which is unpleasant. It’s best, in my view, to pack grease progressively while regularly monitoring the piston position to avoid any marring or scrapping. Grease application is important as it will assist in optimizing your bearings while fighting against their premature degradation.
How to Properly Maintain Your Trailer Bearings with Bearing Buddies?
In order to begin the proper utilization of bearing buds on your trailer and, as a result, ensure a thorough safeguard of trailer bearings, start by examining them from time to time for grease and damage. Apply marine-type grease as necessary, allowing the piston to move slightly outward but ensuring it does not get overfilled. Make sure that the bearing buds and the surrounding areas are clean so that no contaminants can invade and damage the bearings. For boat trailers or trailers that come in contact with water, check the amount of grease and add it if necessary after every trip. Providing bearings with such care and attention will help prolong their life and keep the trailer functioning optimally.
Inspecting the Condition of Your Bearings Regularly
If the condition of the bearings is being evaluated, the necessary details and variations need constant focus. Let the wheel spin and pay attention to any strange sound or resistance that might be signs of deterioration of parts. For myself, checking the grease level beneath the Bearing Buddy cover is common if it has gone too deep. It is also essential to check for leaks, rust, or everything that can indicate a poor seal and maybe a warning of inadequate protection for the bearings. These inspection periods will help avoid expensive repairs and guarantee that the trailer functions efficiently and safely each time.
Repacking Bearings: When and How to Do It
Over time, I have learned that repacking bearings is vital maintenance, and timing is critical. I suggest repacking the bearings no longer than once a year, or every 12,000 miles if that comes first, in order to reap maximum benefits. It all starts with taking off the wheel and hub assemblies, but not before being careful enough to avoid damaging any of the parts. Keeping the bearings clean is also important, and I would, before helping out, clean them with a degreaser in order to remove the old grease, which can attract dirt, and also thoroughly check them for wear and pits. On the off chance they appear damaged, it is downright better to switch them out completely. After ensuring that they have been cleaned and checked, the next step is to pack them with high-quality grease so that they get full surface coverage. Afterward, the pack is controlled and shifted back onto the axle, securing tightness for proper functioning. All in all, this simple yet significant process ensures maintenance of the operability and rotation of the wheels while also lightening up the amount of downtime incurred. However, as they say, details matter, and paying attention to the smallest of things while repacking can play a vital role in ensuring no damage occurs to the bearings and their lifespan gets extended.
Using a Grease Gun for Optimal Performance
In the process of bearing maintenance, a grease gun happens to be quite handy as it assures efficiency in the performance of a grease fitting. What’s more important is that it reduces the cleanup and wastage to a great extent by allowing grease to be squirted into tight spots without excessive effort. While operating a grease gun, ensure that it is loaded with the designated grease for your bearings. Move the nozzle in a firm manner against the fitting. Next, pump the handle slowly until you see grease coming out from the sides signifying that it is sufficiently lubricated. This is often a neglected aspect leading to a common over-greasing error, so cease immediately once excess grease is seen. Ensure the cleanliness of the grease gun by cleaning it on a regular basis as even a small amount of dirt can be detrimental to the bearings. A properly controlled grease gun also simplifies the lubrication procedure, thereby increasing the machinery’s effective operational age.
What are the common issues with bearing buds?

flooding the Bearing Buddies with grease appears to be one of the foremost problems. A good number of users pump in. a lot of grease, which makes the spring-loaded piston seat deeper than it should. Such action endangers the seals and may give rise to grease oozing, which creates a mess. Another common problem occurs during the installation of the bearing buds. When a Bearing Buddy is not fully seated, it is able to slip during work and thus does not do the work for which it was intended. Furthermore, the idea of occasional maintenance can be of assistance, for example control of water intrusions or the right grease being used, otherwise bearing failure will occur earlier than expected. The prevention of such problems involves careful work with the units, regular examinations, and adherence to manufacturer instructions. If looked after well, bearing buds are able to effectively enhance the durability of the wheel bearings.
Identifying Grease Oozing Problems
Uneven surface pressure may be the result of a faulty seal or an over-pressurization from grease, both of which may be denoted by evidence of grease leaking from Bearing Buddies. In order to determine the cause of the problem, the spring-loaded piston should be examined; if it is in a fully compressed position, there will be an excess of grease. Besides, the rest of the components should be inspected to determine if there were any atrophied or misapplied seals, in which case grease could have seeped through. Make adequate cleansing and verification that the right quality and quantity of the grease recommended has actually been used. These parts need to be observed on a regular basis so as to reduce the chance of grease leaking and pointlessly increase efficiency.
Understanding Seal Failures and Their Impact
In my experience, the three main causes of seal failures have been a cause for concern, and they may even assist you in avoiding needless complications in the future. The following are the primary reasons for seal failures and their impact:
- Improper Seal Installation: Most seal failures are related to incorrect installation procedures; thus, ensuring proper installation is a priority as it will minimize the chances of a seal distortion and, consequently, opening. This greatly reduces the likelihood of facing problems such as grease escape and the need to troubleshoot the matter afterward, thus avoiding these mistakes in the future, and mandatory instructions are followed while putting on seals.
- Wear and Tear Over Time: All parts after a given period of action will experience a great amount of distribution to different directions and angles, namely, in this context, seals. And because seals are put through multiple stages, namely heat and friction with pressure, they will eventually give up. The major concern is always to keep an eye on radiographs while doing periodic maintenance to avoid them getting out of hand and causing damage.
- Use of Incorrect Grease: Every sealing material should be covered with grease for better performance, but using non-compatible grease on a seal can cause damage to the said seal. This is due to some greases chemically reacting to seals because they contain varying additives and dissolve the seal. In order to avoid this while also ensuring maximum seal performance, always check the manufacturer’s requests before using grease.
- Operating Conditions Beyond Design Limits: Due to excessive heat, pressure, or environmental conditions, a seal can get pushed beyond its design capability. It is prudent to ascertain the limits of your seals, such as the following:
- Maximum Ambient Temperature (expressed in Fahrenheit and Celsius),
- Pressure Rating (given in PSI or in the bar) and
- Chemical Compatibility ( concerning the environment or materials)
- Contaminants in the System: Ingress of dirt, debris, or even moisture to the system results in swift erosion of seals. A Clean working environment and the use of suitable covers or shields can greatly minimize these dangers.
Seal failures damage performance, ranging from grease contamination to absolute failure of the bearing. This, in return, may cause poor efficiency, expensive maintenance or loss of functionality of the equipment. Preventive actions like following maintenance schedules, usage of appropriate materials, and cleaning of systems not only enhance the performance of seals but also help guarantee that the bearings are dependable for a longer duration.
How to Troubleshoot Bearing Buddy Issues
Bearing Buddy issues always seem to require the same Fix. First, look for any form of damage, such as cracks, missing chunks, or dents on the Buddy itself. Otherwise, make sure it is aligned properly to the hub, as any detachment might change the whole design. If grease is leaking out, it is either too much grease or the seal is damaged. I suggest looking for the wear on the seal and swapping it out if any is found against the recommended precision level. Also, ensure that the hub is clean, as any dirt around it could also prevent lubrication by blocking the grease fitting. From my viewpoint, examination, and analytics serve the Bearing Buddy system in terms of time and efficiency.
Can Bearing Buddies Be Used on Boat Trailers?
It’s true that Bearing Buddies can be used on boat trailers. They maintain pressure and lubrication on wheel bearings, thus preventing water from intruding, which is typical for boat trailers that are usually submerged in water whenever they launch or retrieve the boat. This product is recommended for use on boat trailers. Suitable installation and regular checks are important to ensure effectiveness and enhance the longevity of your bearings in marine settings.
Adapting Bearing Buddies for Marine Environments
The adaptation of Bearing Buddies for marine environments is rather simple… as long as certain procedures are followed. My first recommendation is to use stainless steel bearing Buds because they tend to be less prone to rust and corrosion due to soaking in salt water. Rinse the trailer with fresh water after every trip, especially when used in saltwater conditions. That way, corrosive agents are kept away or at least removed with the rinsing. Secondly, check the grease level on a regular basis and make sure that the hub is sealed so that water cannot come in. Such simple measures will ensure that your Bearing Buddies protect your boat trailer from deterioration for a longer period of time, thereby reducing the chances of expensive repairs.
Considerations for Boat Trailer Maintenance
When taking care of a boat trailer, it is essential to first check the wheel bearings, brakes, lights, and tires. It is necessary to pack the bearings with grease in order to seal them out and avoid water entry, particularly in the marine environment. Rinse off the trailer regularly, especially after using it in saltwater, to prevent corrosion. Additionally, check the tire pressure and amount of tread to reduce problems on the road as well as regularly check to ensure that the lights and electrical connections are in a workable condition. If all of these basic requirements are met, they will improve the durability and safety of your boat trailer by a considerable margin.
Differences Between Trailer and Boat Bearings
The main differences with respect to trailer and boat bearings are the design, materials, and environmental conditions. According to my background in the field of the industry, trailer bearings are usually designed to bear the impact of the constant and heavy loads of road transport; thus, durability and resistance to heat are of the essence. On the contrary, boat bearings are customized for use in vessels, often being provided with extra sealing to face occasional immersing into the water as well as to avoid rust. It is key to note these disparities in approaches prior to service or change of a bearing in order to avoid mistaken application of bearing types, which can decrease the equipment’s efficiency or cause malfunction sooner than expected.
Reference
- Bearing Buddy Official Website – This site provides detailed information on how Bearing Buddies work and their proper usage.
- The Hull Truth Forum – A forum discussion about the use of bearing buds and the types of grease to use.
- iFish Forum – A community discussion on maintaining Bearing Buddies and troubleshooting common issues.
Frequently Asked Questions (FAQs)
Q: What are Bearing Buddies, and why are they important?
A: Bearing Buddies are devices designed to protect and lubricate trailer wheel bearings. They’re important because they help maintain a positive pressure inside the hub, preventing water and contaminants from entering and damaging the bearings. This extends the life of your bearings and reduces maintenance needs.
Q: How do I install Bearing Buddies on my trailer?
A: To install Bearing Buddies, first remove the existing grease cap. Clean the hub surface and ensure it’s dry. Place the Bearing Buddy over the hub and tap it gently with a rubber mallet until it’s fully seated. Make sure it’s flush and secure with the hub.
Q: What type of grease should I use with Bearing Buddies?
A: Use a high-quality wheel bearing grease or marine grease. These types of lubricants are designed to withstand high temperatures and pressures. Some popular choices include lithium-based greases or synthetic greases specifically formulated for wheel bearings.
Q: How often should I add grease to my Bearing Buddies?
A: It’s recommended to check your Bearing Buddies before each trip and add grease as needed. Generally, you should add grease until you see a slight movement in the piston (about 1/8 inch). Don’t overfill, as this can cause grease to leak onto your brakes or wheels.
Q: How do I know if I’ve added enough grease to my Bearing Buddies?
A: When adding grease to your Bearing Buddies, stop when you see the piston move outward slightly (about 1/8 inch). This indicates that the cavity is filled and there’s positive pressure inside the hub. If grease starts to come out around the spindle, you’ve added too much.
Q: Can I use Bearing Buddies to completely repack my wheel bearings?
A: While Bearing Buddies are great for maintaining grease levels, they’re not designed for completely repacking bearings. To properly repack bearings, you should remove the wheel, clean out old grease, inspect the bearings, and manually pack new grease into the entire hub and bearings.
Q: How do I grease my trailer bearings using the Bearing Buddy?
A: To grease your bearings using the Bearing Buddy, locate the zerk fitting on the front of the device. Use a grease gun to slowly pump new grease into the fitting. Continue until you see a slight movement in the piston, indicating that the hub is filled with grease and there’s positive pressure inside.
Q: What are the signs that my Bearing Buddies aren’t working properly?
A: Signs of malfunctioning Bearing Buddies include excessive grease leakage, difficulty in pumping grease into the zerk fitting, or visible damage to the Bearing Buddy cap. If you notice any of these issues, it’s best to inspect the device and potentially replace it.
Q: Can bearing Buds prevent water from entering my wheel bearings during boat launching?
A: Yes, one of the main benefits of Bearing Buddies is their ability to maintain positive pressure inside the hub, which helps prevent water from entering when launching a boat. However, it’s still important to let your hubs cool before submerging them in water to avoid creating a vacuum effect.
Q: Do I need to remove bearing Buds when repacking my wheel bearings?
A: Yes, when it’s time to repack your wheel bearings (typically annually or every 12,000 miles), you should remove the Bearing Buddies. This allows you to properly clean out old grease, inspect the bearings and races, and manually pack new grease into the entire hub, including the inner and outer bearings