Choosing not to maintain the bearings when performing regular maintenance on your vehicle can be highly detrimental – but knowing how to replace a wheel bearing should make it somewhat easier. It is true that, with time, a lot of elements inside a bearing will become worn out, and the best and perhaps only solution is wheel bearing replacement. This guide aims to explain the process of replacing either the front or the rear wheel bearings with a fair amount of precision and confidence. You may be a competent `do it yourself` mechanic or just beginning to learn how to maintain a car. You will be provided with the information, tools, and steps needed to complete a wheel bearing replacement successfully. From understanding the inner workings of a wheel bearing to the process of changing the wheel bearings successfully, you will be better able to approach the task like a professional and increase the usability of the vehicle.
What are the signs of a bad wheel bearing?
Every driver should be attentive to every change in their vehicle’s condition since some issues are not evident, or some may start only by driving a few miles. As for diagnosing a faulty wheel bearing, there are common signals that anyone should take note of. To start off, drivers would hear howling, grinding, or even grunting sounds coming particularly from the wheels while turning or accelerating the car. Also, keep an eye out for abnormal patterns of wear on the tires, slack or shaking motion of the steering wheel, or transmit vibration in the steering wheel. A compromised wheel bearing leads to poor grip on the steering wheel or considerable pulls in one direction. When any of these signs surface, one must seek automatic treatment as the weather changes circumstances could worsen the damage and expedite harm to yourself and those around you.
Unusual noises from the wheel area
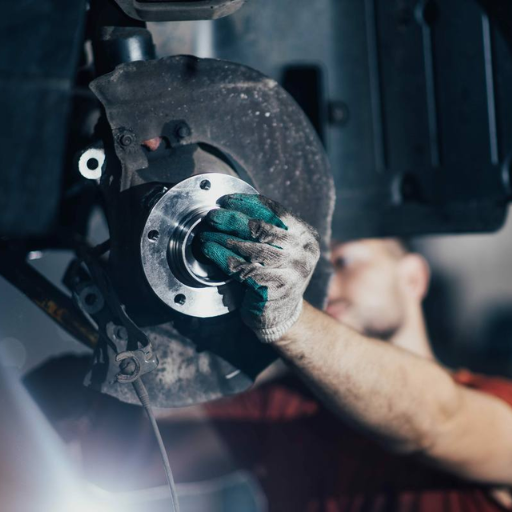
the very first thing I look for when dealing with wheel bearing issues is a strange sound coming from the area of the wheel. Any kind of grinding or humming noise is typically a sign that the wheel bearing has started to wear out. I always advise focusing on the characteristics of the noise and its timing. If it changes during a turn, expect damage to the bearing. Early intervention can spare you from more expensive repairs in the future, i.e., in the hub assembly or the axle. So, never forget that neglecting such indicators can affect your vehicle and even endanger your safety on the road.
Steering wheel vibrations
If you notice that the steering wheel vibrates even when you are not turning, the steering angle remains the same. Check your suspension as well as your tires and brakes, as they may be unbalanced or worn out. Pay attention to when these vibrations take place, are they only in high speeds or when you brake, or are they present at all times when you are driving? This will help determine the cause of the problem quite accurately. Fixing these problems quickly allows for a better driving experience while also keeping your vehicle safe from sustaining additional damage.
How do I prepare to change a wheel bearing?

Changing a wheel bearing requires meticulous preparation, and I never skip important steps. I get everything I’ll need, such as a jack, jack stands, a lug wrench, a socket set, a torque wrench, and, of course, a wheel bearing kit that’s tailored for my ride. Now, moving on, I make sure to perform the task on solid ground and set the vehicle to a stationary position, ensuring applying the handbrake. I prioritize safety standards even in the smallest tasks; hence, I go the extra mile by wearing gloves and inserting wheel chocks to stop any rolling. Furthermore, I would refer to the vehicle’s manual to note down certain specifics and procedures that may differ from other vehicles. Everything is lined up for action, which minimizes the amount of downtime, meaning the task can be done systematically.
Gathering necessary tools and equipment
In order to prepare, I always begin with a deep checklist so that I don’t miss anything critical. Depending on the job, I narrow down what is needed for that job. When I am getting ready for vehicle maintenance, for example, replacing a tire or checking brakes, these are the tools that I concentrate on:
- Jack and Jack Stands – Moving a vehicle is one thing, but lifting the vehicle off the ground to work on it is another. It is important to make sure the vehicle remains stable while any work is done on it. To make sure the jack works well, I always check if the jack has a suitable weight rating that corresponds to the requirements of the vehicle.
- Lug Wrench – This is needed so that one can tighten or untighten the lug nuts placed on the wheels. As a suitable alternative, I use a cross wrench or a telescoping lug wrench, which is also handy.
- Tire Pressure Gauge – In case the work involves measuring or adjusting tire pressure the recommended use of the tool is best to ensure that the reading is in accordance with the recommended range of the manufacturer.
- Protective Gloves and Safety Glasses – The right safety gear can increase the chances of you not getting injured so much that you would have to stop working. The ones that I put on while working on a vehicle include gloves and glasses — gloves protect my hands from getting greasy or scraped, and the glasses protect my eyes from debris.
- Wheel Chocks – If the work done on the vehicle requires it to be stationary, then these are a must to help make sure of that.
I always try to have a set of tools arranged in an organized manner before commencing my task. At times, such a task does get hectic and can be complicated; hence, in order to avoid rushing, I always make it a habit to cross-check all my items with the manual of the vehicle, as not doing so can be fatal for the process. There is no question that time and arm strength can be saved by proper planning and organization. Let’s start with the basics.
Safely lifting and securing the vehicle.
To properly secure the vehicle and prepare for lifting, it is important to leave the car on a durable and wide region, for instance, a cemented driveway, and then engage the parking brakes. After that, install wheel blocks on the wheels opposite the one being lifted so as to avoid any movements. Do remember to read the manual in order to avoid putting jacks in the wrong area. There are jack points in every car and they mark the area where a jack can be used. A robust car jack is also preferred as it makes it easier to raise the vehicle to the preferred height. Once the car is elevated then use super strong jack stands to rest the weight whenever necessary, make sure to drag it slowly. Whenever putting weight, always have jack stands nearby whenever working under the car. To conclude, following these steps ensures that everything is set correctly so that any risks that may occur during repairs are avoided.
Removing the wheel and brake components
To lift and support the vehicle securely, first, drive the vehicle over a flat and stable surface, such as a concrete driveway, and then set the parking brake. Chock the wheels which are diagonally opposite to the end about to be raised to immobilize the machine. Refer to the manual of the vehicle to find the authorized locations for the jacking points because incorrect installation could lead to the breaking of the vehicle. Raise the car with a good quality hydraulic jack, making sure the vehicle is firm on the ground before putting it up to the required height. After lifting, strong jaws are placed at the earmarked area, and the vehicle is lowered over such strong ‘jaws’ or stands; this way, steady support is maintained. It is unsafe to work on a vehicle supported only by a jack because the risk of creeping of the vehicle is very high, the use of jack stands is an important safety measure to observe. With the proper technique, it is possible to maintain a secure configuration, thus decreasing the odds during the setup, vehicular maintenance, and several other tasks.
What’s the process to remove the old wheel bearing?
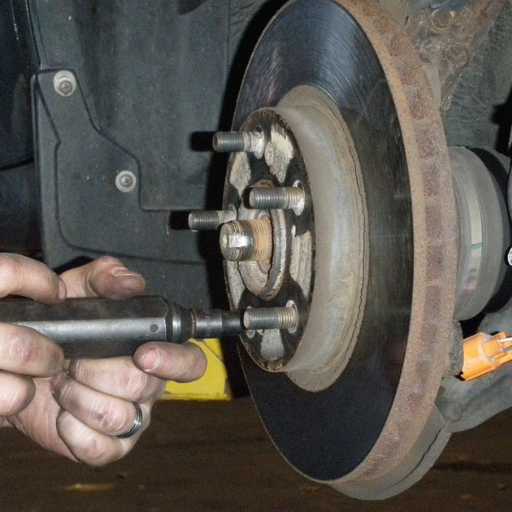
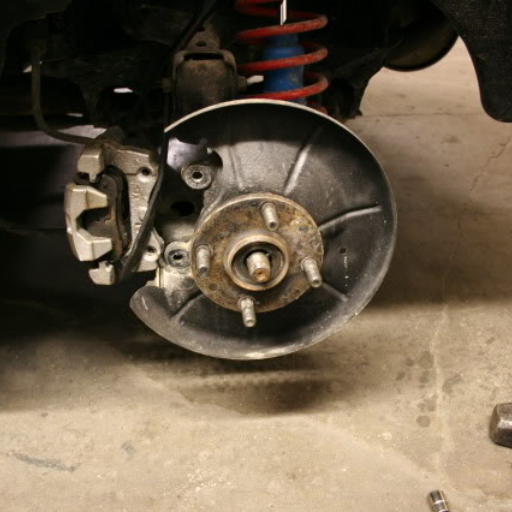
In order to take off the old wheel bearing, first secure the car by raising it off the ground then take out the wheel, this gives access of the hub assembly. Now, take out the brake caliper, rotor, and any dust caps that might be hiding the axle nut. Next, unlock the axle nut and take it off as well. This is required to detach the hub that is bolted on the knuckle. Depending on the type of bearing, an appropriate bearing puller or press can be used to remove the old bearing from the hub. Before putting on the new bearing, be sure to clean and check all components for signs of wear or damage.
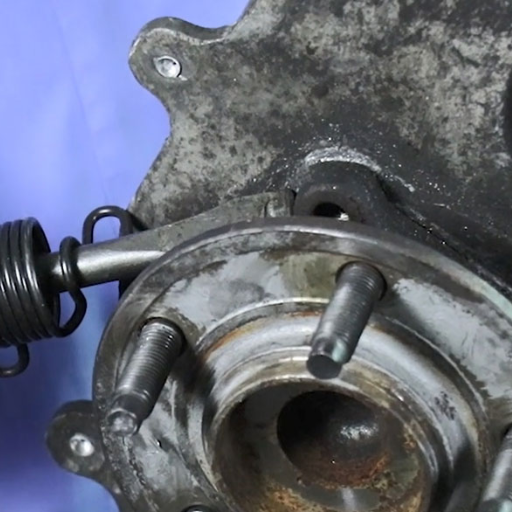
Accessing the hub assembly
removing the hub assembly calls for a proper combination of patience as well as precision. The first place where I always start is making sure that the vehicle has been solidly placed on the ground with jack stands and that all necessary safety processes have been followed. As a result, the removal of the wheel means that I carefully proceed to dismantle the brake caliper as well as remove the rotor so that I don’t end up damaging any parts. There is a tendency to deal with rust and other forms of debris while trying to take off the axle nut or working on the hub assembly, which could be problematic. To avoid compromising the integrity of adjacent parts, it’s important to make use of the right tools, like a press or even a bearing puller. Once the bearing has been extracted, it’s vital to inspect the components’ surfaces for wear and perform all the necessary cleaning. After doing so, it’s next to impossible to ensure that the repair work is seamless and continues to last for a long time.
Removing the old bearing from the hub
To take the old bearing out of the hub, the wheel assembly must be removed first by ensuring that the vehicle is properly supported on the lift or jack. After doing this, a bearing puller or a press-specific tool can be used to take out the bearing, applying gentle but consistent pressure to take care of the hub and other components. In case the bearing is stuck due to debris or rust, using penetrating lubricant and moderate hits with a mallet can loosen the bearing. In every case, tool alignment and safe removal procedures must be observed to ensure safety throughout the removal process.
Cleaning and inspecting the hub
cleaning and looking over the hub is one of the few steps that preempt smooth and sound working installation. So what I do is first take a clean rag or a wire brush and clean any loose materials, rust, or grease off the surface of the hub. In addition, it is also important to check the hub for damage in the form of wear and cracks as well as handling uneven surfaces since these factors always lead to bearing and many more failures. If I see something that I think maybe an issue later on, I make sure to get rid of it there and then – that may be sanding down sharp features or replacing the whole hub. It makes sense to do such cleaning and examination, as it will save a lot of trouble in the future, and it is highly likely that everything will operate as it should.
How do I install a new wheel bearing?
To make the wheel bearing replacement seamless, appropriate tools and expertise are required. Accessing the hub assembly entails the following processes – pulling the vehicle up, removing the wheel and then the brake caliper and rotor. After this, grab the old bearing, which is attached to the hub, and use a puller or press to take it off, but make sure that the surrounding parts are not damaged. Once the hub has been cleaned check if there are any fractures or corrosion. In order to fit the new bearing, press it evenly at any position and use a bearing press tool to do so. If everything is intact, torque road wheels and nuts according to the manufacturer’s specifications before installing additional subassemblies on top. To make sure there was zero harassment when the new installation has been secured, rotate the wheel to test whether everything operates as it should. This final step guarantees an utterly seamless and safe installation.
Selecting the correct replacement bearing
In my opinion, it is critical to focus on three factors when selecting replacement bearings. That’s compatibility, quality, and application. First, I check it against the requirements of bearing manufacturers regarding the physical size, load capacity, and materials. Furthermore, I always select bearings made by reliable companies because of their quality and strength in extreme conditions. The last item is the type of application, which may be automotive, industrial, or others, to ensure smooth operation performance under the design environment. If these measures are taken, the replacement would be quick and easy.
Properly seating the new bearing.
Correctly placing a new bearing increases its durability and performance. First, make sure to tidy the seating location to get rid of waste and grease. Make sure to guide the bearing to the shaft or housing correctly in order to disallow incorrect mounting. Rather, use a press or a bearing insertion tool to apply adequate force without employing straps or other unseemly tools. Verify that the bearing is completely engaged and turns freely without rub. Lastly, apply the recommended grease to allow proper functioning under pressure.
Applying the right amount of bearing grease
In reference to the application procedure of bearing grease, I always stress the keyword ‘precision’ for optimal functioning. Do not apply too much since this can lead to overheating. While the application of too little grease can lead to inadequate lubrication, resulting in wear and tear, The technique I adopt is to apply grease until one-third of the free space of the bearing is occupied. This, in turn, maintains equilibrium and avoids failures due to any defect in lubricants. If the application involves a grease gun, I work slowly watching for grease coming out of the seals. When this practice is cared for consistently, the bearing will operate properly and work for a longer time.
What are the steps to reassemble the wheel after bearing replacement?
- Clean the Wheel Hub: After cleaning the Wheel Hub and all components, it is ensured that no dirt, debris, or old grease is left over. This is important for a clean assembly and optimal function.
- Install the New Bearings: The New Bearings are then gently pressed in their respective slots within the wheel hub as the alignments are taken care of. This is done using a tool or a press in order to prevent misalignment.
- Apply Grease: To prevent wear from happening early, it is recommended to take high-quality grease and apply it on all moving parts, as grease is known to provide smooth fitting.
- Insert the Axle: Once the grease is applied, check the alignment and smoothness throughout the rotation as the axle is slowly pushed into the bearings while the entire assembly is communicated with the hub.
- Secure the Retainer Components: Ensure reinstalling of the seals or washer and even the retaining clips in the right arrangement and such that they fit.
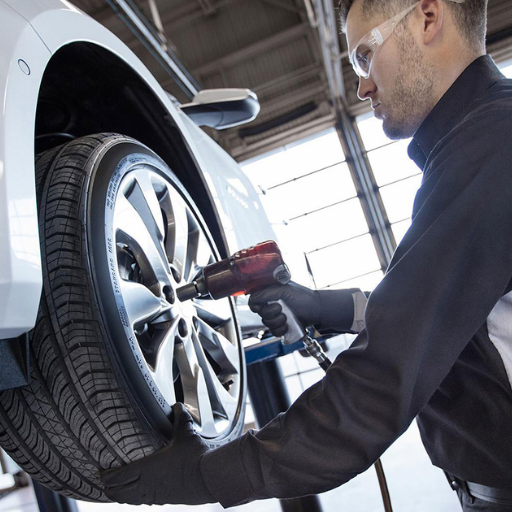
- Tighten the Fasteners: The wheel has to be fitted and secured with bolts or nuts as per the required torque specifications. This process is essential to operate safely.
- Test for Smooth Operation: Crank the wheel by hand in order to check if there is an excessive force or noise that suggests that the wheel has been assembled properly.
- Complete Final Checks: Validate the alignment, greasing, and tightness of the fasteners before making use of the vehicle,e plus operating equipment.
Reinstalling the hub assembly
The installation of the hub assembly is both an art and a science. This being said any professional will tell you that you can avoid most mistakes by paying attention to the assembly process and cleaning relevant sections prior to starting. Start the process of fitting the hub assembly to the axle shaft or spindle so that the hub assembly is not disengaged from its parallel position. I tightened the bolts according to the instructions and did not use excessive force, as it might lead to breakage. As a final touch, it would help to inspect the rotor and the spindle for abnormalities, including smoothness of rotation. This approach has never failed me during all the years I have spent in the industry.
Reattaching brake components
Replacing and attaching the braking components calls for the greatest care and following the right set of procedures, ensuring both safety and the proper functioning of the system. To start, fit the brake caliper over the rotor and bolt it using the correct bolts while applying torque specified by the manufacturer to these bolts. The next step is reconnecting any brake lines or cables after fitting them in their proper position and adjusting the tension to nominal. If necessary, replace the clips and/or brackets which hold the brake hose in position. Finally, confirm the response of the pressure adjustment by depressing the brake system before lowering the car for reassembly. This method should guarantee maximum reconnection accuracy while at it.
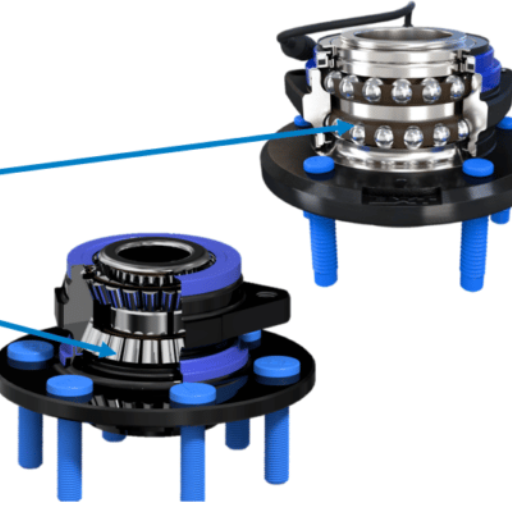
Are there any differences between changing front and rear wheel bearings?
Changing front and rear wheel bearings is not the same, and I have had these differences, so first and foremost, I would like to apprise the readers. Their modern replacement, however, is a bit less complicated in that it often entails the incorporation of entire separate hubs into the assembly of front bearings, but as a result, it greatly complicates the entire replacement process. On the contrary, the rear wheels’ bearings are not only more complex than drum brake components, but they also cause more complications, such as driveshaft axles, which are dependent on the vehicle’s rear or all-wheel drive. Also, some setups may require the use of special tools, such as a bearing puller or press, for rear bearings removal and installation. Recognizing these nuances is critical in making a repair process fast and precise.
Front-wheel bearing replacement specifics.
To replace a front wheel bearing, it is advisable to take out the wheel, brake caliper, and rotor for access to the hub assembly. A good number of front wheel drive cars utilize a bear horseshoe shape that is permanently fixed on the hub of the wheel, consequently, rather than just bearing, the entire hub is replaced. This guarantees that it is slid or pressed into place without any gaps. Other than these issues, placing a wheel is also important that all the components are torqued to the required specifications of the manufacturer and are folded in such a way that they do not interfere with the wheel operation.
Rear wheel bearing replacement considerations.
The process of replacing rear wheel bearings can be extremely troublesome in some vehicles while quite simple in others, depending on their construction. In my case, some of the rear wheel bearings are incorporated into the rear hub assembly, similar to the front arrangement, so replacing them is relatively easy. In contrast, some others demand the bearings to be pressed in and out of the hub, which requires a certain level of expertise and tools to perform without any damage. Remember to pay particular attention to the condition of other parts, such as the axle shaft or even the rear brakes, as they might be in some state of wear. It is also critical that all components are assembled in the prescribed manner in order to avoid future problems with vehicle safety.
When should I seek professional help for wheel bearing replacement?
Should there be uneven tire wear, lack of vibration, or vibration on wheels along with an unpleasant sound, it is the right moment to seek professional help if you do not have the right tools or the knowledge to assist in this issue, as it means that there is a problem. Many times, appropriate wheel bearing replacement cannot be done without the required tools necessary for the specific situation. A competent mechanic can identify the problem and change the bearing as per the set standard, which guarantees protection while driving the vehicle.
Challenges of DIY wheel bearing replacement
Replacing your wheel bearing might appear easy at first, but I have always observed a lot of DIY enthusiasts run into complications while performing such operations. From my experience, initial complications are the ones that frighten a lot of people, such as when you gain access to a wheel bearing, you also have to remove the wheel hub or calipers, which require not just time but the right tools as well. Even with basic mechanical skills, preserving the integrity of key parts such as the axle or the ABS sensor when it’s time for reinstallation is very crucial and more than just precise engineering. Some may spare on removing and reinstallation tools, easily accessible in most professional settings, such as bearing pullers, but that’s not a smart way to go about it as it increases the risk of getting your hands injured greatly, and even after removing some small components if you don’t get your torque settings right whilst assembling the remaining components, it can create huge safety problems. What I factor in after all these observations is contacting a professional with the right tools, as it prevents further complications with the operation overall or anything else for that matter.
Benefits of professional mechanic services
Specialty works like installation or securing portions of vehicles need to be done using both local and international standards. As funny as it sounds, not every person is cut out to be a professional mechanic, as one requires certain expertise, special tools, and many years of experience to certify them. Somehow, professionals assist with many issues head-on as they are knowledgeable enough to understand what lies beneath the underlying issue without visible prompting. Instead of doing what many normal people do when they do not have access to professional equipment, including hydraulic presses and torque wrenches, among many others, they will rectify malfunction without deviating any from the specification of the vehicle manufacturer, thereby ensuring both safety among the users of the vehicles as well as its full performance. To add on the benefits of hiring professional workers, they guarantee their work and give out warranties, which result in the provision of a durable wide range of mechanized services. Not only do experts provide quality work, but they also save time and ensure the safety of the vehicle and its users.
Reference
- How to Change Wheel Bearings: 12 Steps (with Pictures) – WikiHow
- What is a car wheel bearing? How do you replace them? – RAC
- DIY Guide: How to Replace Your Car’s Wheel Bearings – Goodhood
Frequently Asked Questions
Q: What are the signs that I need to change my wheel bearings?
A: Common signs include grinding or humming noises while driving, uneven tire wear, steering wheel vibrations, and a loose or wobbly feeling in the wheel. If you notice any of these symptoms, it’s time to inspect and possibly change your wheel bearings.
Q: How often should I change wheel bearings?
A: Wheel bearings typically last between 85,000 to 100,000 miles, but this can vary depending on driving conditions and vehicle make. It’s best to have them inspected during routine maintenance and replace them when signs of wear appear.
Q: Can I change wheel bearings myself, or should I seek a professional mechanic?
A: While it’s possible to change wheel bearings yourself if you have the right tools and experience, it’s a complex job that requires precision. If you’re not confident in your mechanical skills, it’s best to consult a professional mechanic to ensure proper installation and avoid potential safety issues.
Q: What tools do I need to change wheel bearings?
A: To change wheel bearings, you’ll need a jack and jack stand, lug wrench, socket set, torque wrench, pliers, and a bearing puller. Specific tools may vary depending on your vehicle’s make and model. You may also need a new wheel bearing assembly and bearing grease.
Q: How do I remove the old wheel bearing?
A: To remove the old wheel bearing, first, ensure the vehicle is on a level surface and properly supported with jack stands. Remove the wheel, brake caliper, and rotor. Then, depending on your vehicle, you may need to remove the hub assembly or use a bearing puller to extract the old bearing from the hub.
Q: How do I install a new wheel bearing?
A: After removing the old bearing, clean the hub and surrounding area. Press the new bearing into place using the appropriate tools, ensuring it’s seated correctly. Reassemble the hub assembly, rotor, and brake caliper. Finally, reattach the wheel and tighten the lug nuts to the proper torque specifications.
Q: Is the process different for front or rear wheel bearings?
A: The general process is similar for both front and rear wheel bearings, but there may be some differences depending on your vehicle’s design. Front-wheel bearings are often part of the hub assembly, while rear wheel bearings might be separate components. Always consult your vehicle’s service manual for specific instructions.
Q: How long does it take to change wheel bearings?
A: For an experienced mechanic, changing wheel bearings typically takes 1-2 hours per wheel. However, for a DIY enthusiast, it may take 3-4 hours or more, especially if it’s your first time or if you encounter any complications.
Q: What are the risks of driving with bad wheel bearings?
A: Driving with bad wheel bearings can be dangerous. It can lead to increased tire wear, reduced steering control, and in extreme cases, the wheel could seize or detach from the vehicle. It’s crucial to address wheel bearing issues promptly to ensure your safety on the road.
Q: How can I extend the life of my new wheel bearings?
A: To extend the life of your new wheel bearings, avoid overloading your vehicle, drive carefully over rough terrain, and keep your wheels properly aligned. Regular maintenance, including periodic inspections and re-greasing (if applicable to your bearing type), can also help prolong the life of your wheel bearings.